- There are many good and bad techniques when it comes to breaking in a baseball glove or mitt
- In this guide, we’ll provide you with a comprehensive instructions on how to break in a baseball glove the right way
Introduction
When I coached a bunch of 8 to 10-year-old players, it was common to see first-time players with their new baseball gloves on the field.
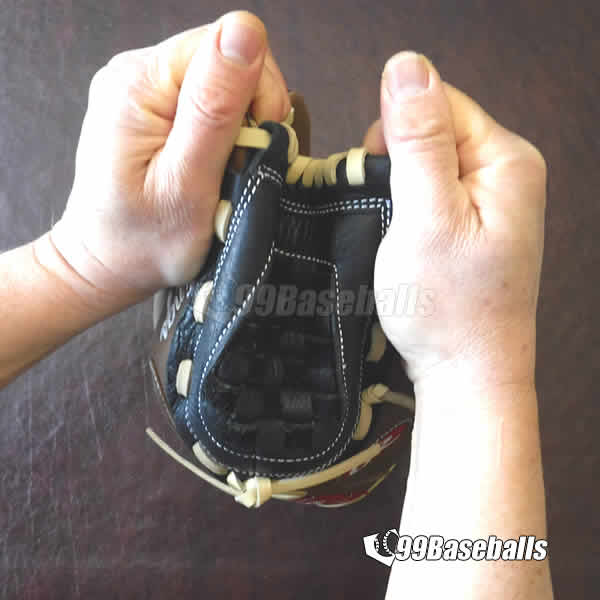
So it was no surprise to see a young outfielder catching a fly ball, only to cough it up because he could not squeeze the glove tight enough. Or a shortstop who fielded a ground ball, but could not throw the runner out in time because the ball rattled inside her glove.
It doesn’t matter if you buy a top-of-the-line, $1,000 baseball glove or a $100 glove. A properly broken $100 glove will outperform a poorly broken-in $1,000 glove or mitt every time.
On the contrary, you do not want to over do it either as that will lead to a “floppy” or pancake glove.
Rather than rushing, I invite you to read the entire post so that you can learn to properly break in your baseball glove or mitt.
Table of Contents
- Introduction
- What does it mean to break-in a baseball glove
- Why do I need to soften or shape my baseball glove
- Do I really need to break in my child’s baseball glove?
- When to break in a baseball glove
- Do It Yourself or Pay Someone
- Step-by-Step Instructions on How to Break In Your Glove or Mitt
- Step #1 – Tools and Materials You Will Need
- Step #2 – Apply the Glove Oil
- Step #3 – Shape Your Glove
- Step #4 – How to Soften the Glove
- Step #5 – How to Break-in a Pitcher’s Glove
- Step #6 – Break-in Catcher’s Mitt
- Step #7 – How to Break-in a First Baseman’s Mitt
- Step #8 – Break-in Middle Infielder’s Gloves
- Step #9 – Break in Third Baseman’s Glove
- Summary
- Frequently Asked Questions
What does it mean to break-in a baseball glove
A brand new glove or mitt made from leather is typically very stiff and rigid due to layers of leather, foam and felt paddings necessary to protect a player’s hand.
The “break” in process is designed to loosen or soften the rigid area of a particular glove so that a player can field a batted ball.
The end product is a baseball glove or mitt that is comfortable to wear, has a pocket depth that improves ball retention (pocket depth is specific to position; we will go over this in detail later), and allows quick ball transfer.
Contrary to popular belief, breaking in a baseball glove does not mean that you should indiscriminately pound the glove with a mallet or run over it with a car.
You DO NOT want to end up with a baseball glove that is pancaked (flat) and “floppy” (no rigidity or structure). The break-in methods vary depending on the glove material, construction method, model, and maker.
Why do I need to soften or shape my baseball glove
Depending on your preference and position you play, you want to remove *some* rigidity from the glove while retaining the shape that is appropriate for your defensive position.
The intent of breaking in a baseball glove is to soften and mold the leather so that it will be comfortable and flexible for a player to use during practice and game.
Without this crucial step, the glove would be too stiff to open and close, making it harder for young player to catch and hold onto the baseball.
Take a look at this short video from BatBros:
Notice how he is trying very hard to squeeze his new baseball glove but having a tough time holding on to the ball? And he is a fully grown man.
If you consider how tough it would be for a younger player to do the same thing, you can understand why breaking-in a brand new leather glove is important.
The goal, at the end of the break-in process, is to have a baseball glove or mitt that feels like a natural extension of your hand so that you can focus on making plays.
Do I really need to break in my child’s baseball glove?
To make it easy for a glove to open and close for youth players under the age of 9 or 10, many glove makers incorporate a combination of thinner leather and synthetic materials.
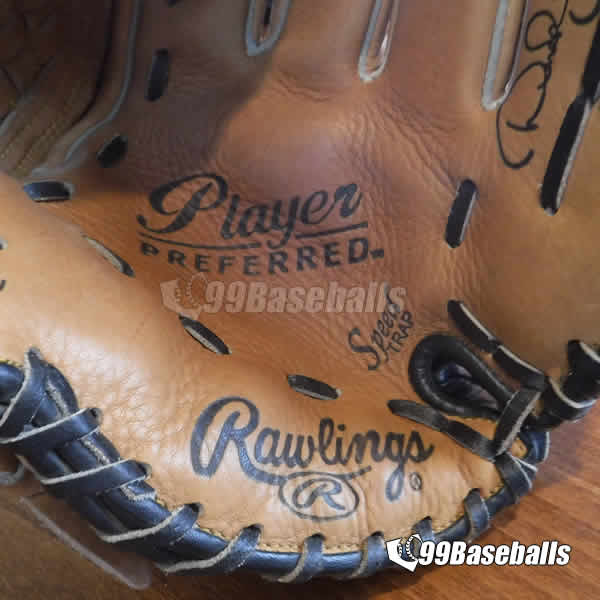
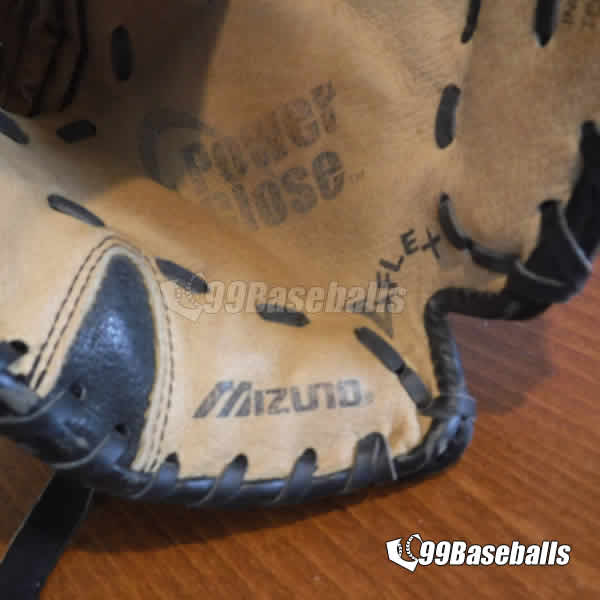
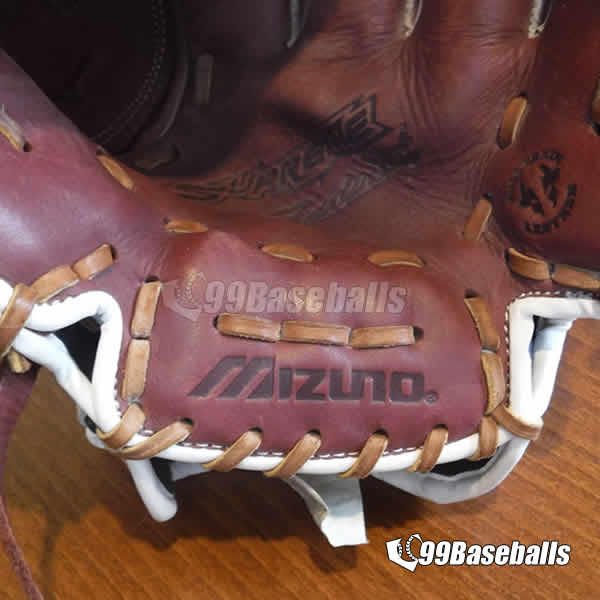
Some glove makers like Rawlings and Mizuno produce youth baseball gloves with heel cutouts to make it even easier to catch a ball (Rawlings calls it “Speed-Trap” under the Player Preferred models and Mizuno calls it “Power-Close” or “Sure-Catch“).
For older and adult players, Rawlings produces gloves under the moniker, Heart of the Hide R2G (“Ready-to-Go”).
However, if your child is competing at a higher level at a young age, you will want to buy a glove or mitt with high grade leather for maximum performance.
Yes, it will take longer to break in gloves with thicker leather but they will last longer.
When to break in a baseball glove
The traditional glove break-in method takes about three to four weeks to get the glove ready.
If you need to use a new glove for tomorrow’s game, start breaking in your baseball glove as soon as you have it.

The “fast break-in method”, which takes about 2 hours, will be enough to get your glove ready for your game quickly. After the game, you should take time to work on the glove some more.
Break in your glove or mitt in a warm environment as heat makes the leather more malleable and easy to work the glove.
Do It Yourself or Pay Someone
There are three options for breaking in your baseball glove or mitt:
- Do It Yourself (DIY)
- Pay someone at a sporting goods store
- Pay a specialty glove shop
Each player comes with a unique hand size, shape, and finger movement. By stretching and molding your glove, you are aiming for a glove that acts as a natural extension of your hand.
For that reason, I believe breaking in your baseball glove with your hands is the best way. You can incrementally work on the glove, stop and put it on to test, then work on some more until it fits perfectly in your hand.

If buying your glove from a large retailer, make sure you ask some questions to the person who will be working on your glove as some workers are inexperienced.
On the hand, if you are buying a new mitt from a small, owner-operated store, you may get lucky. Read my entire post so that you are well-versed in the glove break-in process, and pepper some questions at the worker to see if they are competent.
Last option is to ship your glove to a specialty shop to break in your glove, only if recommended by friends or family. It is not cheap (around $40), and the quality of work can be unsatisfactory.
Step-by-Step Instructions on How to Break In Your Glove or Mitt
You should not try to close your new glove or mitt with your hand until it has been broken in. Forcing it close unbroken glove will often result in unwanted creases or bubbles in the pocket (not desirable).
| ALERT |
|---|
| Glove break-in steps are intended for leather baseball gloves or mitts only. Do not follow these steps if you have a glove made with synthetic materials. |
Step #1 – Tools and Materials You Will Need
Use the following checklist as a guideline when breaking-in your baseball glove or mitt.
Glove sizes between 8″ and 8.75″:
- Small-width, hook and loop strap (a.k.a. “Velcro”)
- Tennis ball (8.5″)
- Mallet is NOT NEEDED
Glove sizes between 9″ and 9.75″:
- Small-width, hook and loop strap (a.k.a. “Velcro”)
- Baseball (“9″) or Wiffle ball (9”)
- Mallet is NOT NEEDED
Glove sizes between 10 in. and 10.75 in.:
- Medium-width, hook and loop strap (a.k.a. “Velcro”)
- Two Baseballs (9″)
- Glove oil
- Clean rag
- Mallet is NOT NEEDED
Glove sizes between 11″ and 11.75″:
- Medium-width, hook and loop strap (a.k.a. “Velcro”)
- One softball (11″) + one baseball (9″)
- Glove oil
- Clean rag
- Wood mallet
- Portable heater or hair dryer
- Large towel (to be used as a cushion)
Glove sizes between 12″ and 13″:
- Large-width, hook and loop strap (a.k.a. “Velcro”)
- Softball (12″) + softball (10″)
- Glove oil
- Clean rag
- Wood mallet
- Portable heater or hair dryer
- Large towel (to be used as a cushion)
You may also want to consider purchasing a glove conditioner which is normally used at the end of the season to prevent your glove from drying or cracking during off-season.
Step #2 – Apply the Glove Oil
Glove oil will make the glove more supple and pliable to speed up the break-in process while protecting it from drying and cracking.
| Glove Oil vs Glove Conditioner |
|---|
| Glove oil usually comes in a spray bottle and is used to help break in a new glove. Glove conditioner or cream is a rub on type “lotion” that is used couple of times a year to protect the glove from drying and cracking. |
Leather surface is porous so do not apply any substance that is not designated as baseball glove oil or mitt conditioner.
Apply a small amount of glove oil to a clean rag, then evenly rub on the pocket, hinge point(s), heel, and finger stall laces.
Please remember that less is more when it comes to glove oil or conditioner as applying too much will unnecessarily weigh down the baseball glove and possibly leave an unsightly stain!

You should not apply glove oil to the webbing area as it is not necessary.
When the season ends, you should apply some glove conditioner to prevent your baseball glove or mitt from drying and cracking.
| ALERT |
|---|
| ** DO NOT apply the glove oil directly to the glove as it will be too concentrated and leave a stain **DO NOT use shaving cream, olive oil, butter, or coconut oil **DO NOT apply anything to a synthetic baseball glove without reading the manufacturer’s recommendations ** DO NOT apply glove oil more than once a year to prevent excess build up |
Step #3 – Shape Your Glove
Before starting to beat and roll the glove, we want to set a preliminary shape.
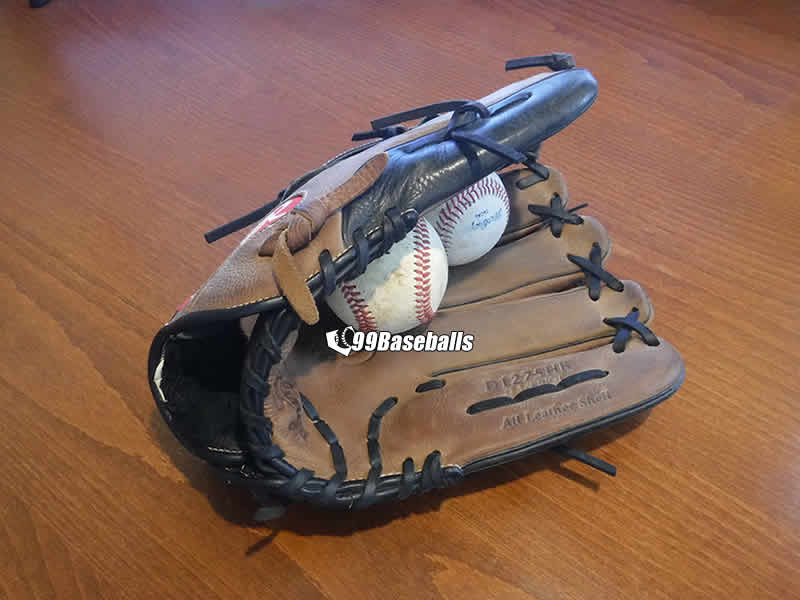
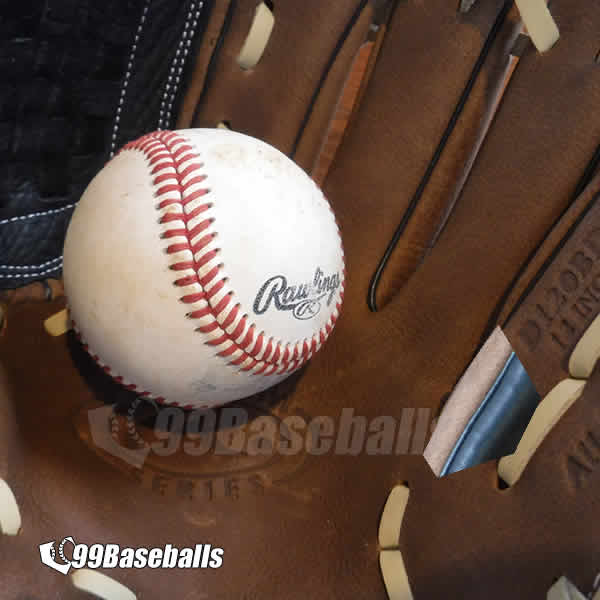
Using the recommended ball combination list in the materials list, place the largest diameter ball in the pocket followed by a smaller ball on top.
Then gently wrap the glove close with a hook and loop strap (again, the key being not too tight).
Adding two balls inside the palm will prevent the glove thumb and finger stalls from curling in. This is especially helpful if you have a glove that is “flared out”.
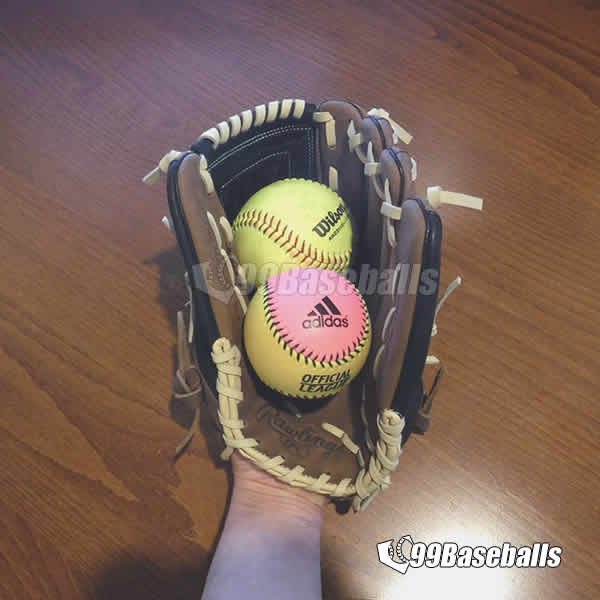
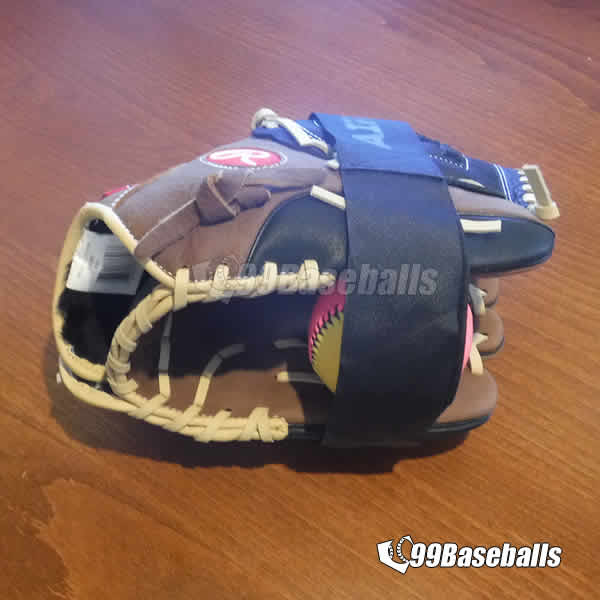

Place the wrapped glove in a warm environment, out of direct sunlight for a day or two.
Youth gloves and mitts (usually 10.75″ or smaller) are made with more pliable materials, so after shaping, there is no need to take additional steps. They should be able to participate in their practices and games.
Step #4 – How to Soften the Glove
Applying controlled heat is key.
If you live in warmer states, you can do it outside in the sun while you work the glove. Otherwise, you will need a portable heater or hair dryer. I am using the portable heater because it allows me to work the glove with both hands while applying heat.
- Step #4a – Turn on the portable heater with medium heat setting
- Step #4b – Place the wrapped glove in front of the heater about 12 inches away
- Step $4c – Make sure to rotate the glove every minute to make sure that heat is evenly distributed
- Step #4d – The glove should be warm, not hot (will take about 5 minutes)
- Step #4e – While the glove is being heated, fold the towel twice into a square to act as a floor cushion
Depending on the position, one or more of the following rigid areas will be broken in:
- Step #4f – Next, go to one of the following sections for further instructions:
- Step #5 – How to Break-in a Pitcher’s Glove
- Step #6 – Break-in a Catcher’s Mitt
- Step #7 – Break-in a First Baseman’s Mitt
- Step #8 – Break-in a Middle Infielder’s Glove
- Step #9 – Break in a Third Baseman’s Glove
- Step #10 – Break in an Outfielder’s Glove
Remember, heat is your friend when breaking in a glove or mitt. Commit to each step with a purpose but re-heat your glove if necessary.
Step #5 – How to Break-in a Pitcher’s Glove
The end goal is to create a glove with a deep pocket with finger stalls spread out to provide a maximum hiding space for a ball and grip.
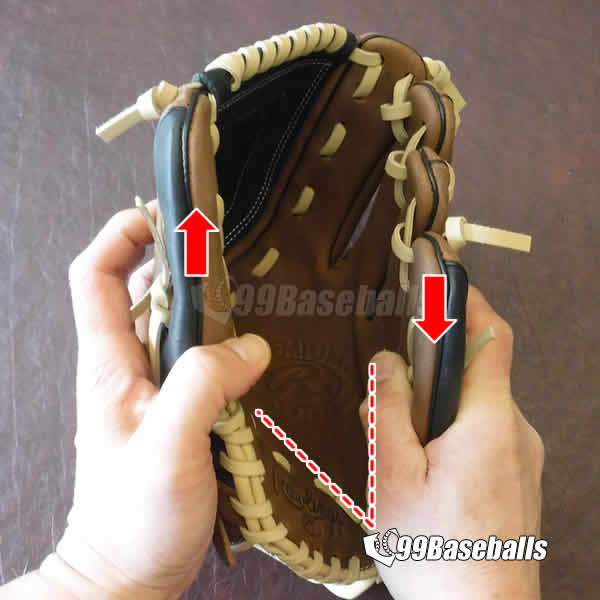
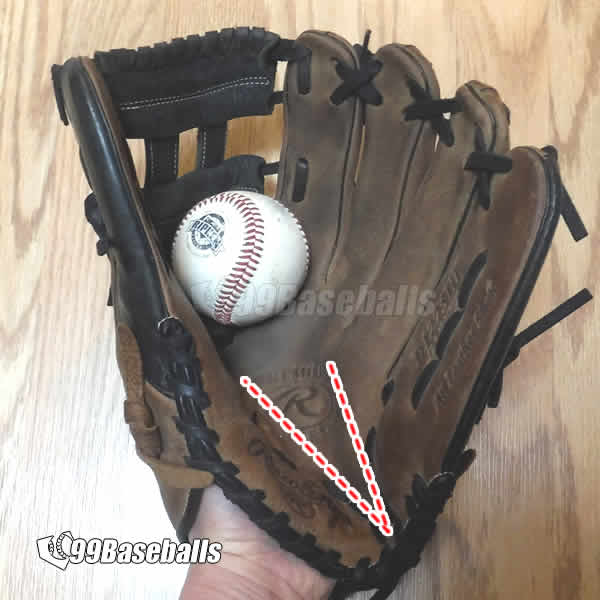
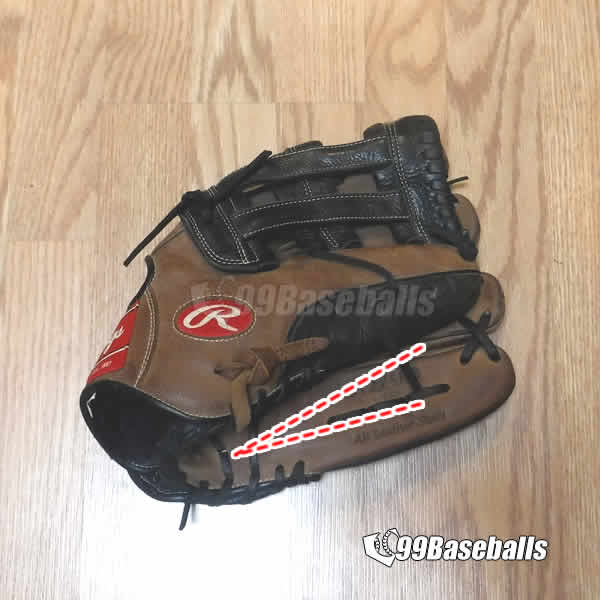
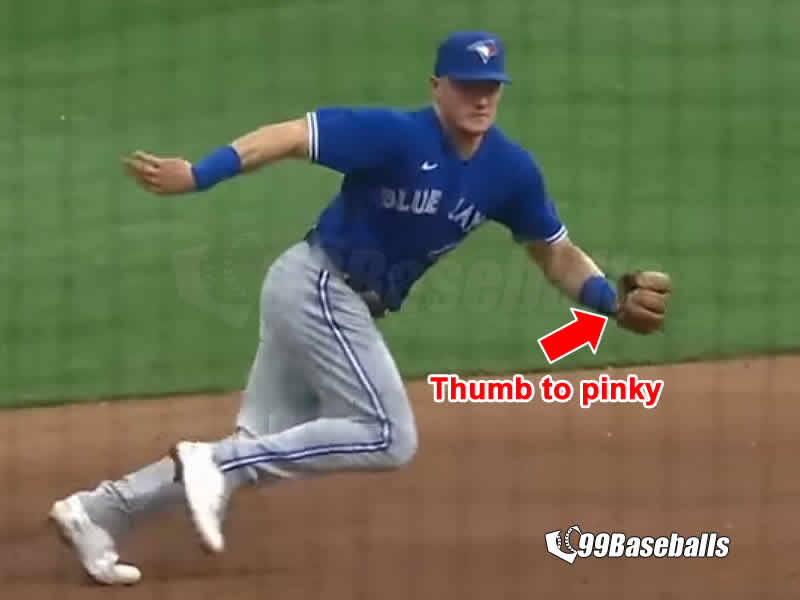
A deep pocket is created by thumb-to-pinky closing action which requires two separate hinges (one by the thumb and one by the pinky).
To make spread out the finger stalls, repeatedly pull and stretch the finger tip lace.
Characteristics of a Pitcher’s Glove
- # of Hinges: Two (one by the thumb, one by the pinky)
- Pocket depth: Deep
- Glove Size: 12″ to 13″
- Finger Movement: Thumb to Pinky
- Finger Placement: Fingers inside individual stalls
Pitching Glove Break-In Instructions
- Step #5a – Turn up the heat to HIGH on the portable heater
- Step #5b – Place the heel close to the heater for 2 minutes to heat up
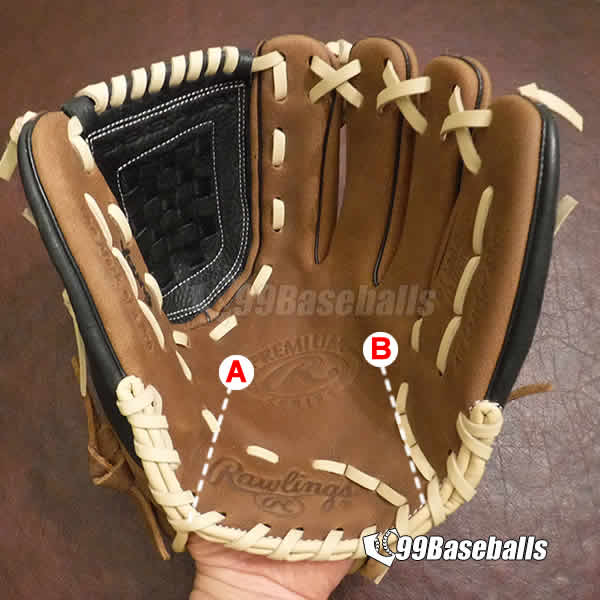
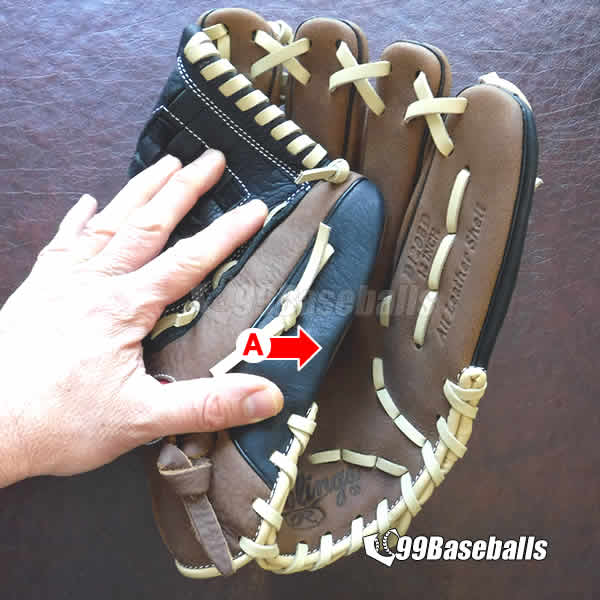
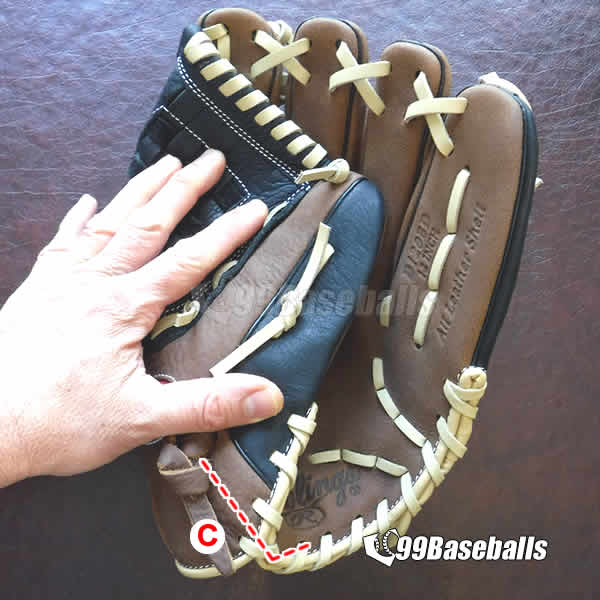
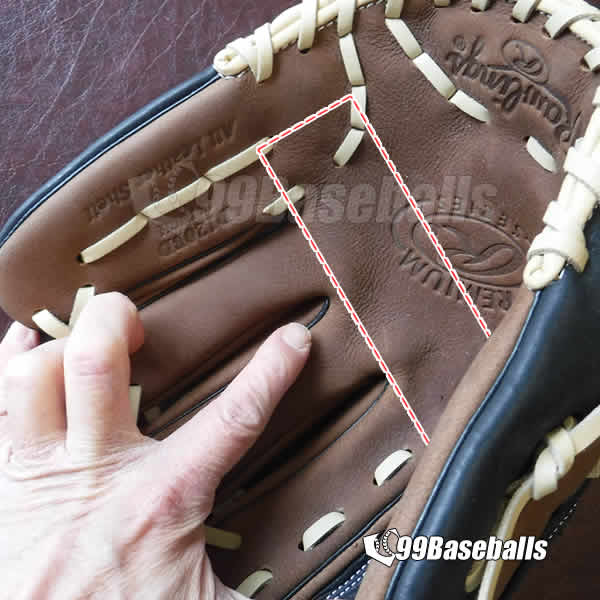
- Step #5c – Fold the thumb over the hinge, along the thumb ridge line (A). Your thumb stall should touch the ring finger stall. Pound the ridge line (C) with a mallet (or your fist) for about 15 times (it should take about a minute); release the thumb stall to its natural position
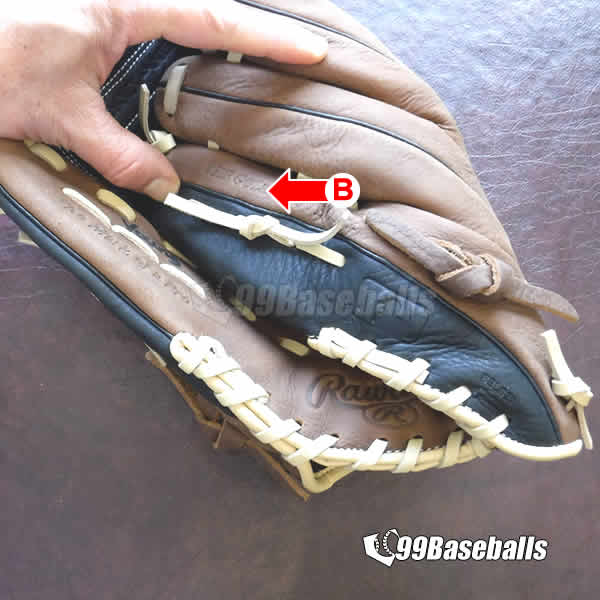
- Step #5d – Fold the pinky stall over the hinge (it will touch just inside the thumb); pound the hinge area with a mallet for 15 times (complete within 1 minute); release the pinky stall to its natural position
- Step #5e – Re-heat the heel; once hot, pound the heel area for 10 times, making sure to cover the entire area; you DO NOT want the heel to lose its shape
- Step #5f – Grab the glove and move up and down along the hinges for about 20 times
- Step #5f – With both hinges loose, work on flaring out the thumb and pinky stall. Also work on the lace on top of webbing
- Step #5g – Depending on your finger length and shape, your glove may form a wrinkle. Use a baseball or wood mallet to pound this area to smooth it out with your hand inside the glove.
The ultimate goal is to form a smooth bowl shape. This step will require a lot of catching and pounding so it will take time.
Step #6 – Break-in Catcher’s Mitt
By far, a catcher’s mitt is the toughest to break-in so it will require more patience and time.
Step #7 – How to Break-in a First Baseman’s Mitt
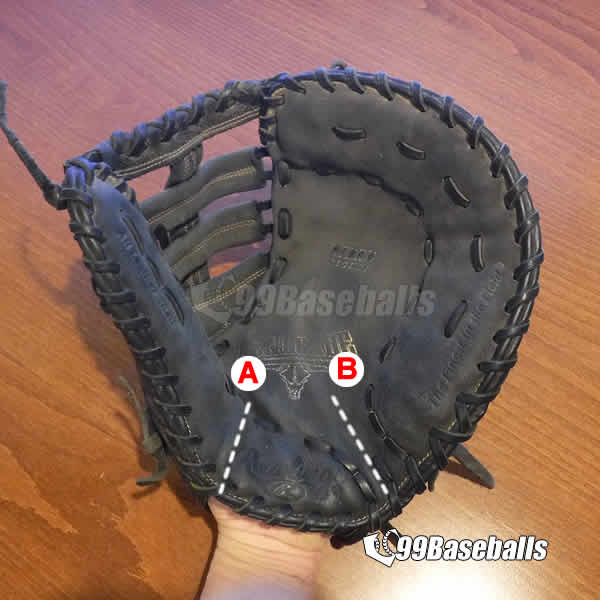
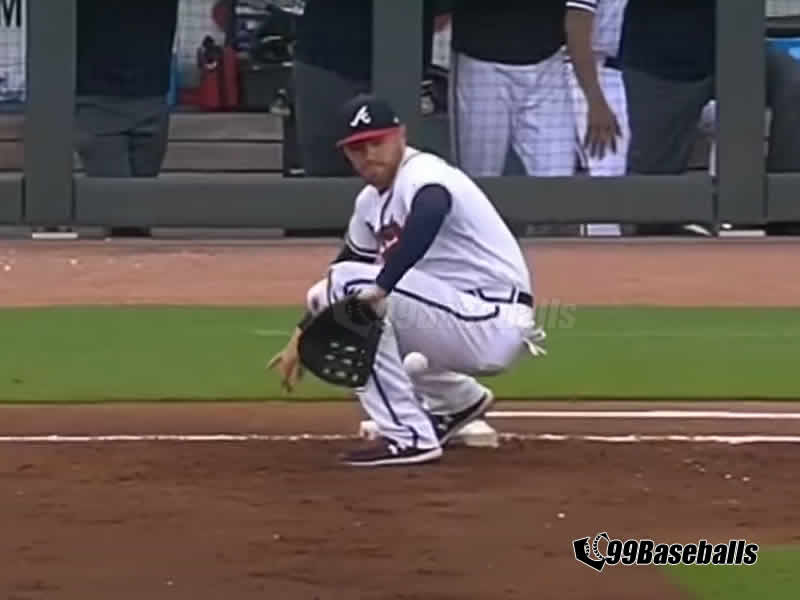
First baseman’s mitt is very large and due to its unique design, it is easy to break it in too much and render it too soft or floppy to use.
There is a healthy debate on the merit between a single hinge mitt vs dual hinge mitt but I personally prefer a dual hinge because the mitt will retain a better shape.
Step #8 – Break-in Middle Infielder’s Gloves
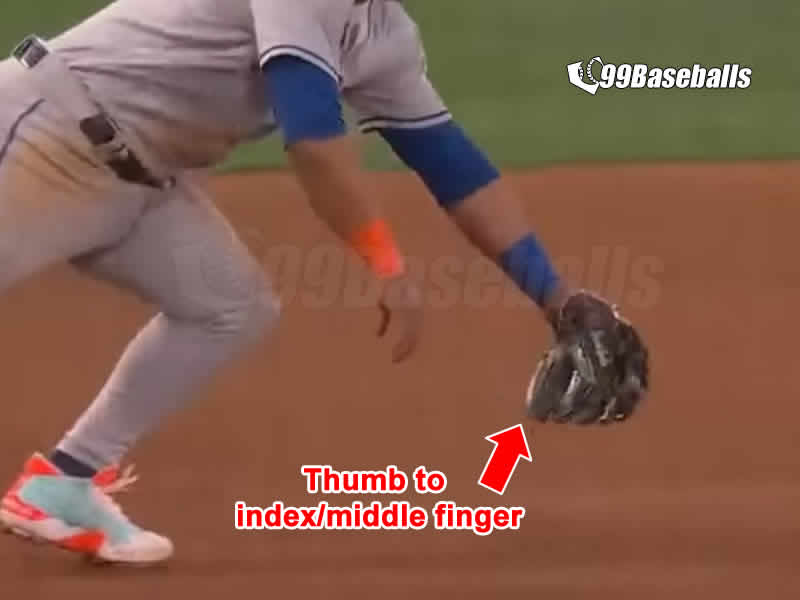
Middle infielders need to quickly transfer baseballs from glove to throwing hand. That requires a glove with fast closing action and a shallow pocket.
Most second and shortstops prefer a single hinge glove which allows it to close fast.
A natural finger movement for a single hinge glove is to touch thumb to the index/middle finger.
Step #9 – Break in Third Baseman’s Glove
Third baseman’s glove is similar to an outfielder’s glove, though others prefer single hinge gloves.
Summary
A properly broken baseball glove will open and close with little effort. That means the glove will naturally envelop a ball when it hits the glove’s pocket.
• Retain its shape when it is resting on the side
Keep these points in mind as you work on your baseball glove or mitt!
Frequently Asked Questions
- Is it really difficult to break in a baseball glove?
- It will take time and effort, but no, it is not that difficult to break in a glove
- Is it possible to break in a glove overnight?
- You can break it in but not completely. The initial break in will allow you to squeeze the glove to field a ball but it will take few weeks of constant catching to get it to mold to your hand
- How long does it take to break in a baseball glove?
- Some baseball purists say it takes couple of years to break in their baseball gloves or mitts. Others say a day to few months. The actual time required to break in a glove will depend on the material (more expensive gloves and mitts come with thicker, more durable leather) and how much effort you are willing to commit.










Gary Brown
Thursday 18th of May 2023
Hi,
Good, informative article. Where's Step 10? Much thanks.